It has been a while since my last blog. Mainly because I moved into a new city and also just not sure what else I could talk about. What did I consume on a regular basis that I’d have the expertise to talk about? Then it struck me: WINE!
Wine has been around since mankind has walked upright. It has been around since the first man or woman used the juice of fermented fruits as a beverage to help with the digestion of a well-rounded and satisfying meal.
I can also imagine that the pairing of the vintages with what foods has also perplexed the hostess to dinner parties of what to serve with what course, red or white.
When I was in France, I found out that the course determined which to serve with what was being served. Depending on how many courses were being served defined what and how many wines would be utilized to give a satisfactory feeling to the dining experience.
Americans simplified it by focusing on the main course or entre to determine what wines to serve. They simplified it to red wine with beef, white with chicken and fish. In recent years the rule has changed to whatever you like is fine.
What I believe to be the real determination of what and how to serve wines is based on the simple rules of chemistry. Being an experiment driven chef, I often look toward chemistry to determine what I pair with different ingredients to come up with different recipes. I use the same when selecting wine to serve with dinners and often brunch.
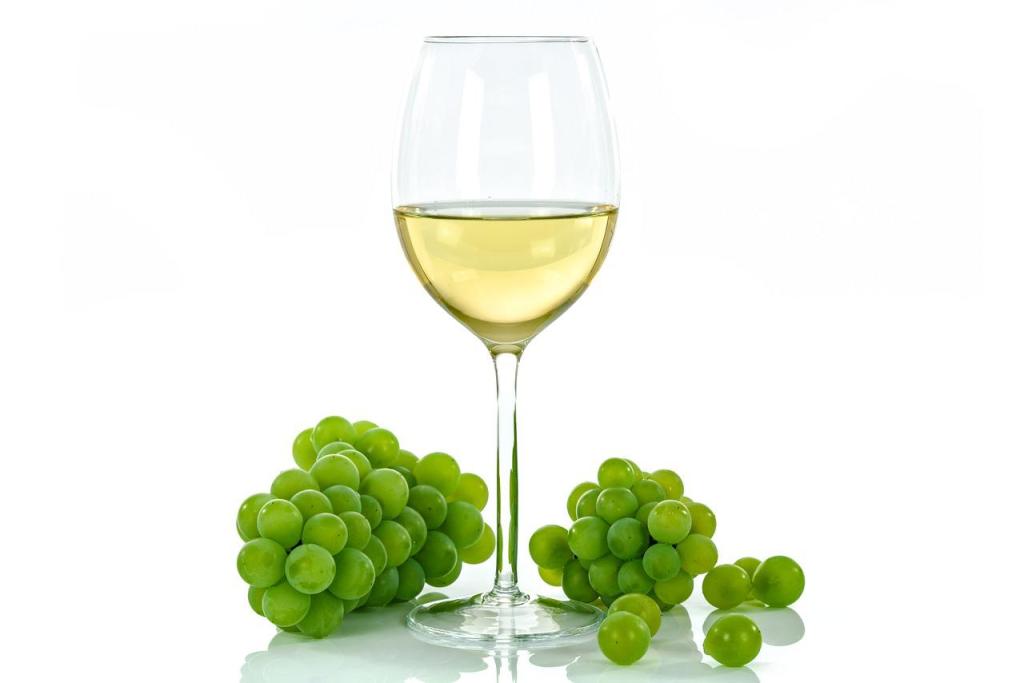
It was once thought that red wines were the go-to for heavier meats like beef. Not necessarily so. All wine (grape juice) starts out white or clear. The color is determined by the grape skins. The grape skins determine the color, number of tannins, sugar and other factors in the flavor or essence of the finish product.
Red wine = Grape juice aged with the skins.
Wine wine = Grape juice aged without the skins.
That is why weather, harvest time, and length of time the skins or musk of the grape determines the bouquet or intensity of the body of the wine.
For shortness of this blog my advice in selecting the wine for your next dinner is simply this. Select your wine pairing with the idea that for delicate flavors like scallops, shrimp or some white fleshed fish select a benign, slightly neutral wine like a light Riesling.
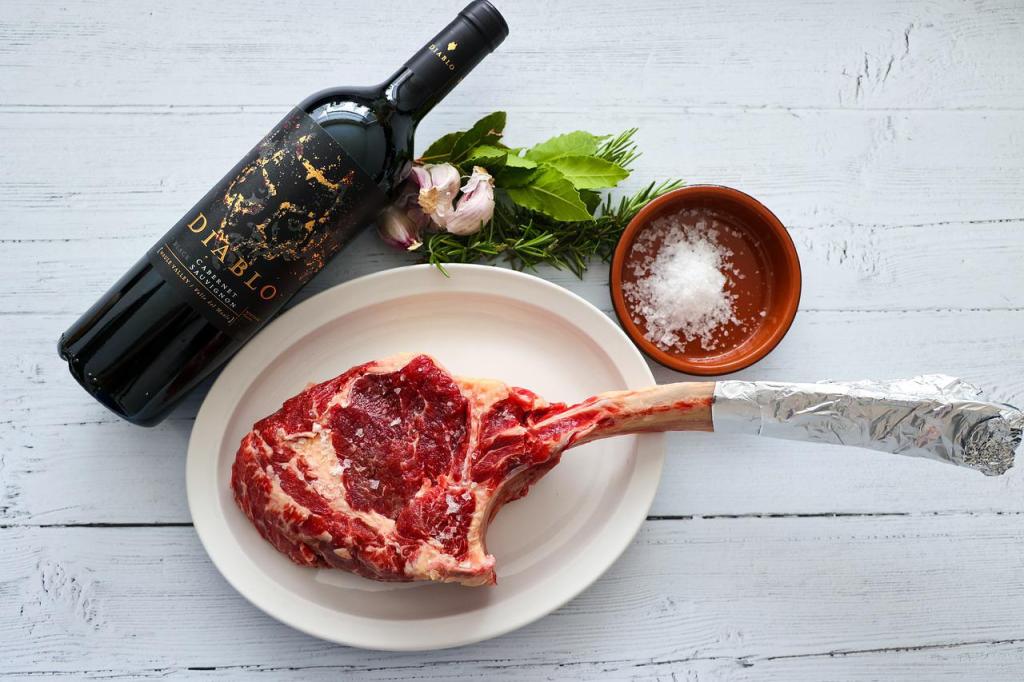
For a heavy, strong flavored protein like a steak you want a full-bodied wine that can stand up to the stronger more robustness. There are a lot of whites out here that can do that.
Red wine, red meat.
Things to take away from this is to remember that hot peppery food usually need a sweeter wine. Savory strong food needs a full bodied strong enough to stand its ground.
Several of my earlier posts have talked about using things like the greens from the leaves of the radish, beet and others that we usually throw away. I have also written about the substitution of common ingredients and how to Google the information. Shortcuts for traditional foods like steamed buns just to name one.
I have also suggested tools and utensils to make a well-equipped kitchen and where to buy them to stretch the dollar just a little further. What makes this post different is that it discusses the use of things that most of us would never think about using: fish fins, backbones, lobster and shrimp shells, and the trimmings of pork, beef and chicken.
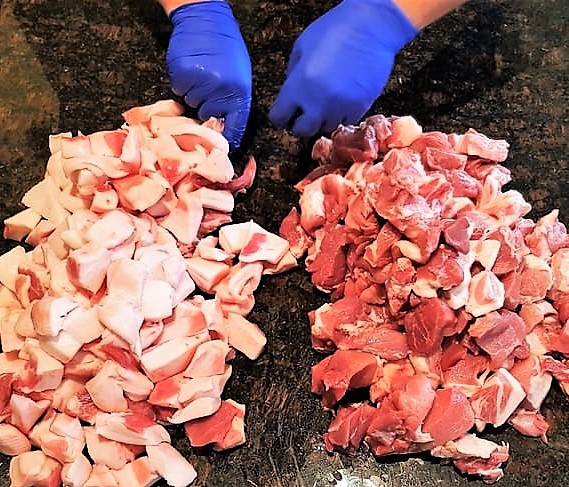
Pork Scraps
Since I usually buy my pork as a whole pork butt or pork shoulder, I do my own butchering. From a pork butt that cost me under a dollar per pound I can get chops, steak, and belly style pieces from it.
What I also can get from the trimmings are small scrapings of meat. By using my filet knife I can separate the silver skin and the indissoluble hard fat. You may not think it is worth the effort but you can get at least two cups worth of usable meat.
Add to it a bit of sage, garlic, fennel seed, pepper flakes, salt and pepper. Mix with ground beef to add a little bit of zing to meatballs, or meatloaf. Fry it up and you have enough for a pasta dish for two. There are of course other uses such as omelets, or a marvelously flavored sausage gravy.
Pork scraps to turn into sausage!
Fish Scraps
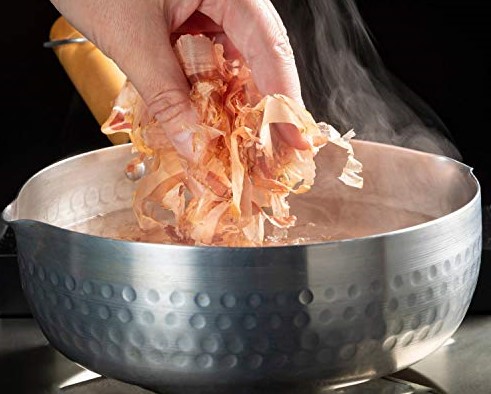
Almost everyone has heard about using fish heads and chicken feet being used in mostly Asian cooking. There have even been songs written about them. It’s for good reason! Fresh fish cleaned but whole is usually a good buy because you get not only the fillets for a main dish, but you get the head, fins and the trimmed pieces of fish flesh. I buy most of my fish already fileted. However, in a lot of cases I have to remove the fins and backbones myself and trim the edges.
Don’t throw any of the trimmings away – put them in a pot and boil them. Dashi is a fish broth made from boiling dried Bonita flakes. Throw a small handful of these along with the fish trimmings boil about 20 minutes. Pour through a fine mesh strainer to remove all the debris and you have a marvelous beginning to fish soups, and stews. Same thing with lobster and shrimp shells. The resulting broth will keep for two or even three days if promptly refrigerated in a sealed container.
Making Dashi with bonito flakes
Chicken Scraps
Chicken is another meat that has useful scraps. The bones of a chicken boiled with some spices like five spice, black pepper, bay leaf, sage will give you a flavorful broth to be used anyway you like. You can shred scraps of spare meat to use in enchiladas, tacos, even blending into a tomato cream sauce to serve with pasta!
Capellini Pomodoro, made with chicken scraps in the sauce!
The moral is: If you just look around and get creative about your cooking you will be able to stretch your food budget just a little further.
Until recently, I knew nothing about the terms ‘umami’ and ‘mouth feel’. Now that I do, I have a new culinary term to add: afterglow.
A decade ago, few home cooks I knew had ever heard of umami. The best I can explain is that everyone knew about sweet, sour, and bitter flavors. Umami is one of those flavors that go beyond, giving a satisfying treat to the taste buds. The difference between good and really, really good.
Mouth feel has more to do with moisture, texture and tenderness. Think of a properly done steak. If you are eating Bar b Que ribs the ‘tug’ of the meat off the bones comes into play. You want it to not fall off when it is picked up but when it is bitten into.
Now for that satisfying afterglow. What is it? For me it is the feeling that all else has been included. The taste, texture and mouth feel. Usually, it has to do with the use of aromatics, such as lemon zest, garlic, onions and capsaicin, (spicy peppers of some sort).
Usually cayenne. Red pepper flakes have several kinds of dried flakes and seeds. Most of the peppers need to be used very sparingly as they all have different Scoville Units. Scoville units are measures of heat. For example, Bell peppers have very little if any. Jalapeno, 2,500 as compared to Serrano at 20,000.
The afterglow I am talking about is a satisfying flavor and warmth at the back of the mouth. Not a burn.
Everyone has different ideas of spiciness. As for me, I like just enough to wake up the recipe and enjoy the flavors of the dish. Too much heat can sometimes mask the flavor of what you are eating and make it unpleasant.
So experiment! There are lots of different kinds of peppers out there and tons of information on their heat index. Find the right level of heat to give you that afterglow!
It occurred to me that some of the most sophisticated and gourmet food started out as simple what was available to use food.
What got me to thinking about this was my recent adventures in the old school Roman pasta dishes.
Listed here are the main four great Roman pasta dishes. Pasta, guanciale, and pecorino are the veins that pulse through each one of these quintessentially Roman dishes. Pasta alla Gricia, Cacio e Pepe, Carbonara, and Amatriciana, each play off of the others and reveal different sides of the same basic concept.
Gricia is simple and focused on the luscious guanciale fat with a dusting of pecorino, while cacio e pepe has no meat just a bit more cheese and pepper for a rich sauce, a very robust Mac and cheese vibe. Add an egg and keep the meat and you have indulgent carbonara. Tomatoes, no egg for hearty amatriciana, more like what most Americans view what an extremely good spaghetti sauce to be like.
Every one of these dishes has no butter or cream added to come up with the creaminess of the sauce. It is all done with the starchy pasta water and cheese. These four examples of Italian, cuisine of what a few simple ingredients can mean. And to think all these years I have been draining all my pasta water down the drain!
French gourmet cookery is based on the same simple concept for using ingredients that are available and at one time cheap.
While not all species of land snail are edible, and many are too small to be worth preparing and cooking. Among the edible species, the palatability of the flesh varies.
Apple snails (Ampullariidae) are also consumed in Asia and can be found in Asian markets in North America. Nutritional analysis shows that Ampullariidae are a nutritious and a good source of protein.
Snail shells have been found in archaeological excavations, indicating snails have been eaten since prehistoric times. Archaeological sites around the Mediterranean have yielded physical evidence of culinary use of different species of snails.
The Romans also considered escargots an elite food. The edible species Otala lactea has been recovered from Morocco in the Roman-era city ruins of Volubilis.
Even more recently, African land snails have been found to be edible.
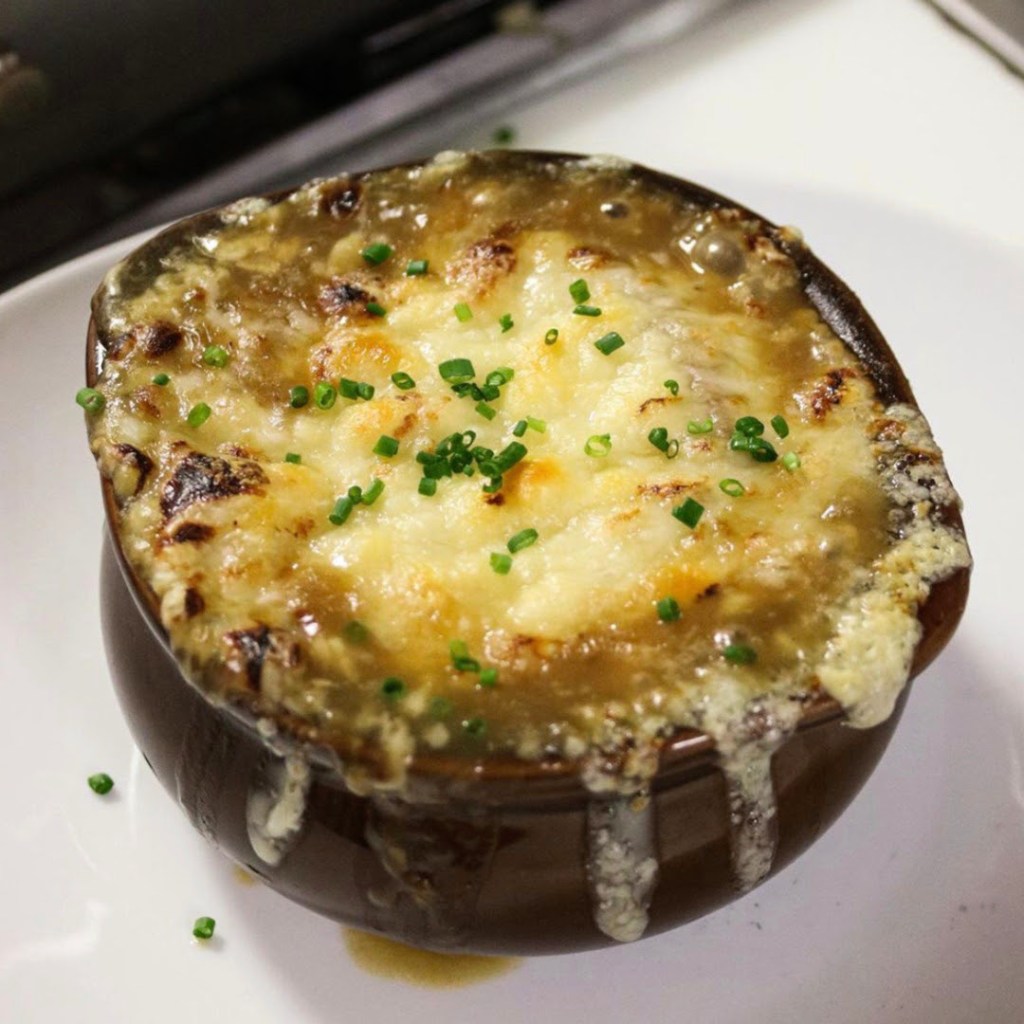
Onion soups have been popular at least as far back as Roman times. Throughout history, they were seen as food for poor people, as onions were plentiful and easy to grow. The modern version of this soup originates in Paris, France in the 18th century. It was made from beef broth, and caramelized onions.
It was introduced to the United States by the New York restaurant of Henri Mouquin in 1861, where his wife Marie Julie Grandjean Mouquin was the chef. It is often finished by being placed under the broiler in a ramekin with croutons and cheese melted on top.
Cajun cuisine is considered simpler ‘country food’, and is based on Acadian cuisine whereas Seafood also plays a prominent part in the dishes. Cajuns are descendants of Acadians who were deported to Louisiana. It’s also believed that Acadians are responsible for normalizing potato consumption in France—a vegetable the French once considered poisonous.
Acadian cuisine has notably served as the base for Cajun cuisine because the Acadian cuisine has been influenced by many things throughout its history, namely the Deportation of the Acadians, proximity to the ocean, the Canadian winter, soil fertility, the Cuisine of Quebec, Native Americans, American cuisine and English cuisine.
The cuisine of immigrants and trading with specific regions of the world have also played small roles. French colonists who settled Acadia in the 17th century adapted their 16th-century French cuisine to incorporate the crops, seafood and animals that flourished in the region. Basically, what was available.
Their descendants became the Acadian people and their ingenuity created Acadian cuisine or as we know it Cajun.
In this blog I touched on basically three of what I would consider the most marvelous dishes and cuisines from the humblest of histories. I know there are more out there, but these will do for now.
When I started writing this blog my intentions were to demonstrate how to eat like royalty on a pauper’s budget. They still are.
One of the things I am going to talk about in this today is the cost of eating fantastic food. I will attempt to break it down to ‘costs per serving’ when using premium ingredients thought to be too expensive for most limited fixed income budgets.
Cheese is one that comes to mind first, especially Parmesan. When I was growing up, I thought the Kraft ‘grated cheese in a green can’ was real Parmesan cheese. Not to slight Kraft but it ain’t Parmesan cheese they are selling – it’s mostly cellulose. Yet it’s still popular because people think it’s relatively inexpensive.
But is it?
A good Parmesan Reggiano can cost at least $20.00 a pound. That is 16 ounces. That breaks down to $1.25 per ounce. A ¼ cup of cheese is two ounces. That is way more than is normally used in a dusting over your spaghetti. The imitation cheese that you get in the green canister is around half the price per ounce, but it has other ingredients in it for shelf stabilization and has practically no taste.
When buying meat products such as pork, I usually wait until it goes on sale which is often. Usually at least one day each month. I have not paid more than $1.50 per pound in I don’t know when. The last one I bought was .89 per pound. I buy them, bone in and cut them up at home. The bone only weighs a a mere .3 pounds, besides when I cut it up I usually leave a bit of meat around the bone to use it in a pulled pork recipe.
When cooked the meat falls away from the bone and the bone adds flavor. Along with the bone in I use pieces that I have trimmed from the rest of the hunk of meat. Pork when boiled the fat falls away from the meat and those very small pieces blend in with the rest. From a 4-pound butt I get fixin’ for at least five ample dinners for two people. That includes the pulled pork, BBQ style steaks, ground pork for sausage and char siu. That is less than a dollar for each serving. The spices and herbs used are very little cost.
Corn on the cob at usually .25 to .50 cents an ear husked. That same corn that has been husked and placed in a container is $6.00 for 4.
The more an item has been handled the more expensive it becomes. Case in point the bulk spices.
I noticed the other day that a spice that I purchase in bulk cost me .79. In the jar for just twice as much it was $5.79. Totally unreal how much we pay just for packaging that is thrown away. Buying bulk I believe we also get a fresher product.
I buy all my pepper as peppercorns and grind it myself. I buy what is called rainbow mix. I never would have thought I would like the smell of pepper. The ground pepper you buy in the store only makes me sneeze, the stuff I grind smells absolutely marvelous. Tastes great on the food, it is fresher so goes farther because it is more peppery.
Buy fresh vegetables rather than canned when you can. They don’t take any longer to cook and they don’t have the extra salt and sugar or other preservatives in them. They do taste different, the flavor of the food come out, you may be surprised to find out that a vegetable you disliked as a kid becomes your favorite.
Be open to trying new things. I am 75 years old I just recently I found out that most of the fresh vegetable leaves are edible. The most astounding to me was radish leaves. They make a good pesto and are good in salads. Who knew, I have been throwing them out for decades. A quick google search will open a whole new world of edibles.
A lady maybe in her fifties in the Sprouts store asked me if I knew how to cook collard greens. She had picked up a very large bag for .99 cents. She had never cooked them before. She had only eaten them once before, but the price encouraged her to try them. That is what I mean by being open to new things.
Cooking shows may not appeal to a lot of people, but the internet has opened up a whole new world of wonders in what is available in fine cuisine while saving a lot of cash on the mean time.
I’m convinced that chicken thighs and pork butt (also known as pork shoulder) are the two most versatile meats around.
One of these days I’ll talk about the chicken. But the purpose of today’s post is to talk about the humble and inexpensive pork butt. Or as it is called around this house, the ‘Wonder Butt’.
Usually this pork can be purchased on sale for under $2 a pound. Of course, that is usually with the bone in. Out of curiosity, I took the bone out and weighed it to see what difference it made in the overall price of the chunk of meat. The answer is 10 cents per pound for your average 4-6lb pork butt. So, if you have a choice between a boneless pork butt for, say, $2.25/lb versus a bone-in pork butt for $2/lb, buy the bone-in version for a bargain.
Don’t worry too much about the bone in any case. I leave it in when I make pulled pork. After cooking the bone just slips out from the meat cleanly. Also, the added flavor from the bone will enhance pork stock.
I save and smoke the trimmings, such as the fat with little chunks of meat attached, to use when I cook a pot of beans. You’ll find that the fat just falls away so it’s easy to scoop out, leaving the delicious meat pieces among the beans.
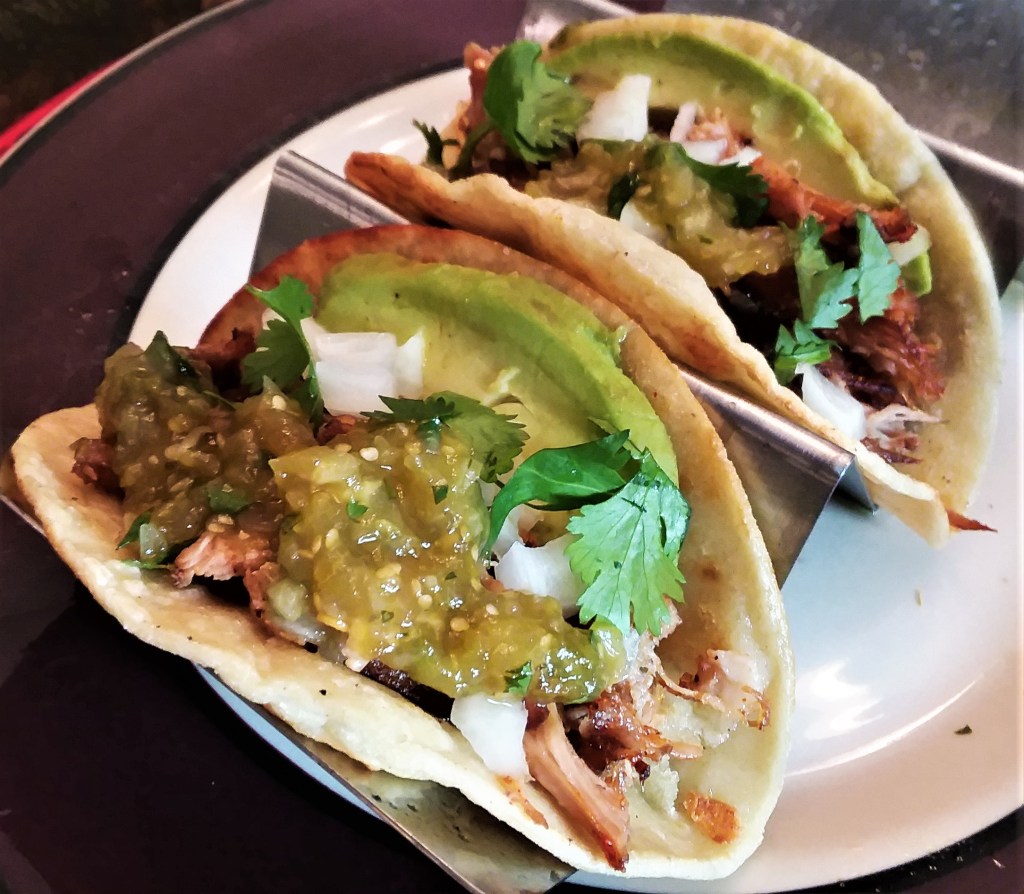
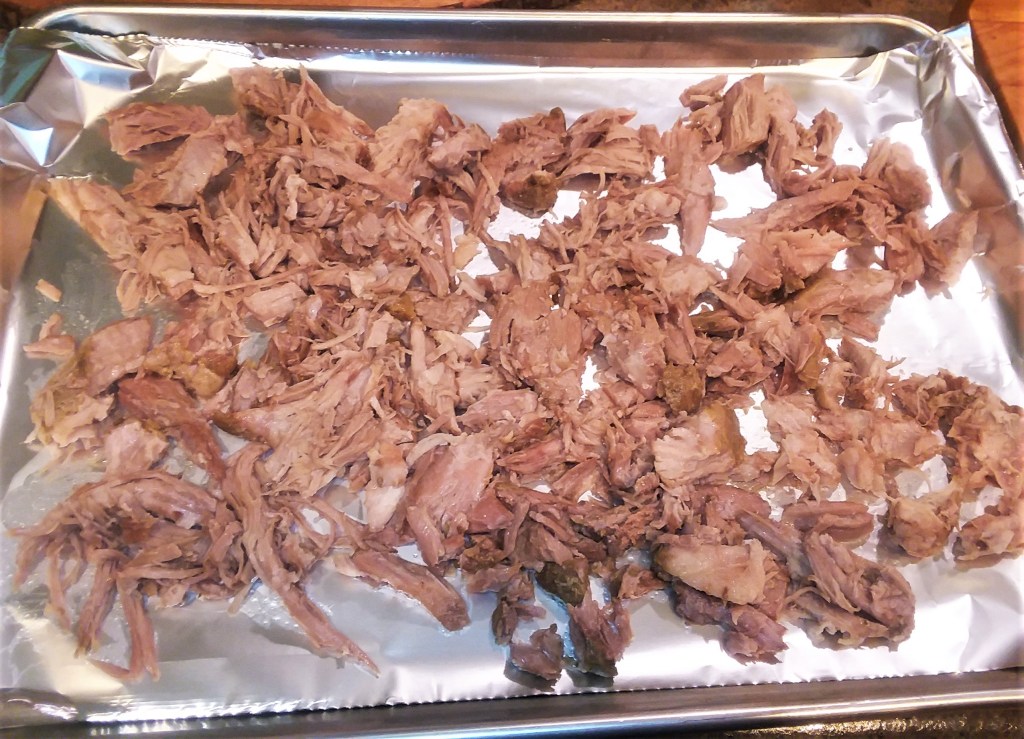
Speaking of meat, now to the meat of this blog: Carnitas tacos using the sous vide cooking technique. Cook about a pound and a half of pork shoulder in the sous vide at 160F for 24 hours.
Pulled pork shoulder after Sous Vide’ing
Meanwhile, we roasted chopped tomatillos, green chiles and onion under the broiler for 13 minutes and blended it into salsa verde. This ended up a little tart for my taste so I added a dash of honey along with minced garlic and roughly chopped cilantro. A little salt and tasted great.
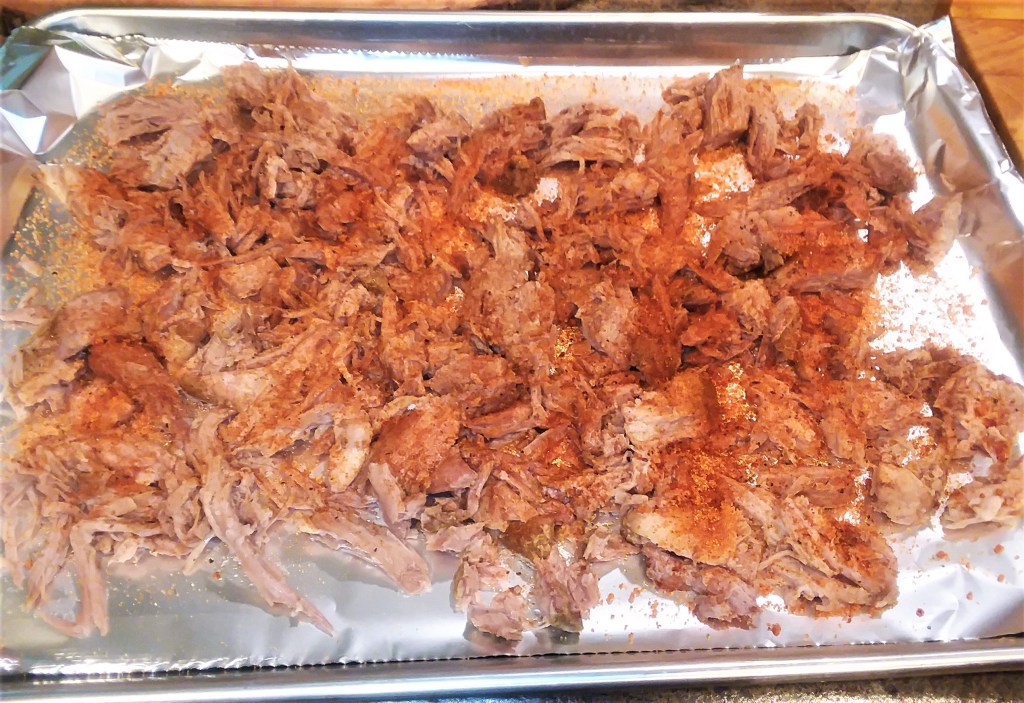
The pork was fall-apart tender, so we shredded it out on a foil-lined baking sheet, topped it with a sprinkle of Honey-based BBQ seasoning. I like Kosmo Q’s ‘Killer Honey Bee’ but you can use whatever you wish, or even a sprinkle of brown sugar. This will help the pork crisp a tiny bit as well as add flavor.
Seasoned Pork
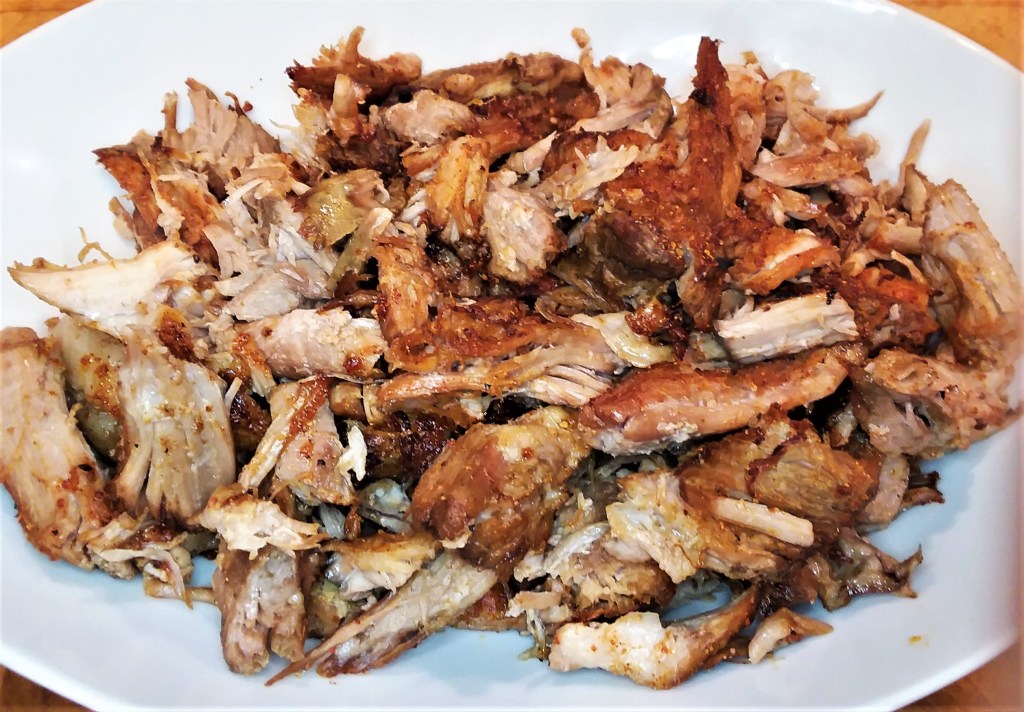
Broiled it for 8 minutes just until we got a little char/glaze atop it. After that, it was taco time!
After broiling – wow does that look good!
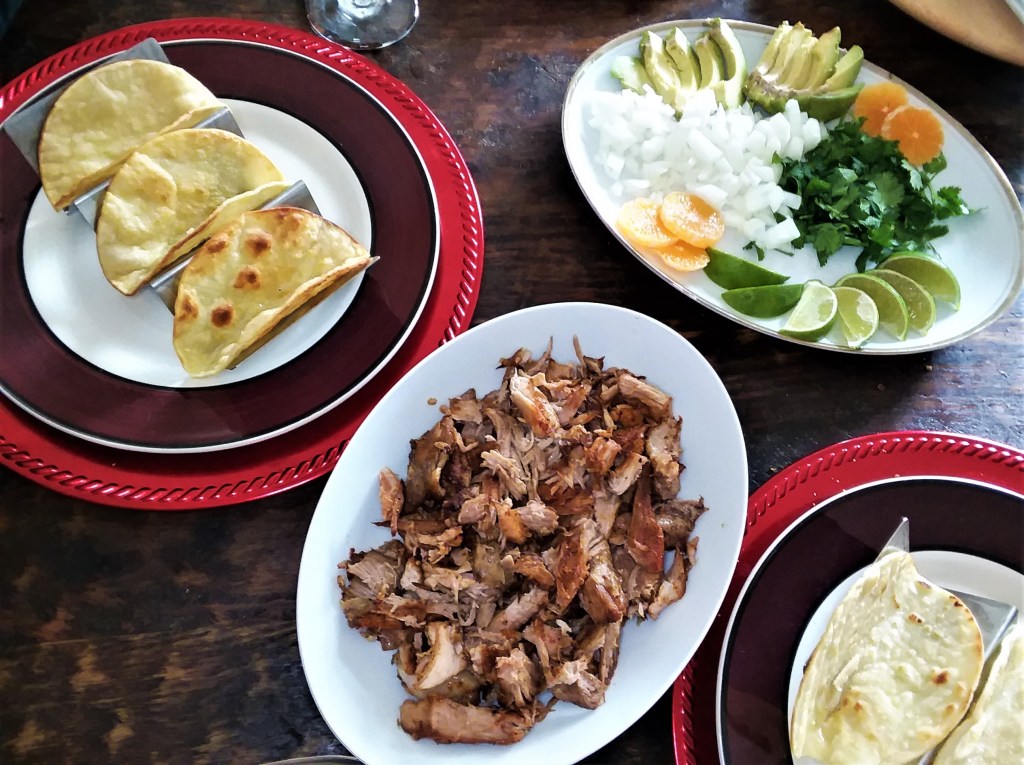
Built up each taco with carnitas pork, a slice of avocado, diced onion, cilantro, salsa verde, and a squeeze of lime. You can use flour-based tacos but corn tacos are the best with this recipe.
The spread.
Absolutely marvelous. The full recipe is below.
CARNITAS FROM THE SOUS VIDE:
4lb Pork Butt
2 bay leaves
1 cinnamon stick
1 onion
1 orange
Optional: Kozmo Q Honey Killer Bee Seasoning
SALSA VERDE:
12 Tomatillos
2 jalapeños (de seeded)
1 Onion
1 tablespoon honey
¼ tsp umami salt
1 clove garlic
Half bunch of cilantro
GARNISHES:
Half onion, chopped
Half bunch of cilantro
Cojita Cheese
DIRECTIONS:
1) Cut pork butt into inch-thick steaks. Season with salt and put into SV along with the spices and halved orange + onion.
2) Sous vide at 160F for 24 hours.
3) Roughly chop Tomatillos, jalapeños (de seeded) and onion and put on baking sheet. Cook under broiler 13 mins.
4) Take out (should be soft and slightly charred) and put in blender. Add remaining salsa ingredients and blend until smooth.
5) Take pork out of SV and shred. Arrange into one layer on foil-lined tray and sprinkle liberally with Honey Killer Bee seasoning.
6) Place under broiler until crisped to your liking. (8 minutes worked!)
7) Chop garnishes and serve with tortillas and sprinkle with cojita cheese.
I don’t know where the idea that radish, turnip greens, carrot tops, kale stems, broccoli stalks, and other common veggie scraps should be discarded came from.
For decades, we’ve been throwing away some of the most nutritious herb portions of the fresh vegetables. Mostly I think because in the grocery store’s produce department they have already been removed. One reason may be because they take up less space after the leaves have been chopped off.
The other reason is the convenience of buying them in a can. Canned veggies are easier to store, last longer and easy to prepare. Today’s busy life-style has even grown the already cleaned, cut up and measured portions of fresh vegetables industry. So for convenience sake, cooks everywhere have lost knowledge while loading their family’s dinners with loads of salt and sugars for preservatives.
Fortunately, that knowledge can be regained with a push of the button on Google search. Learn what the term organic really means, instead of just paying higher prices for items that are labeled as such.
Visit a local farmers market if you can. Where I live in Texas, I am lucky. Any Saturday there are at least three within driving distance. There is also Asian food markets. They are all worth a visit.
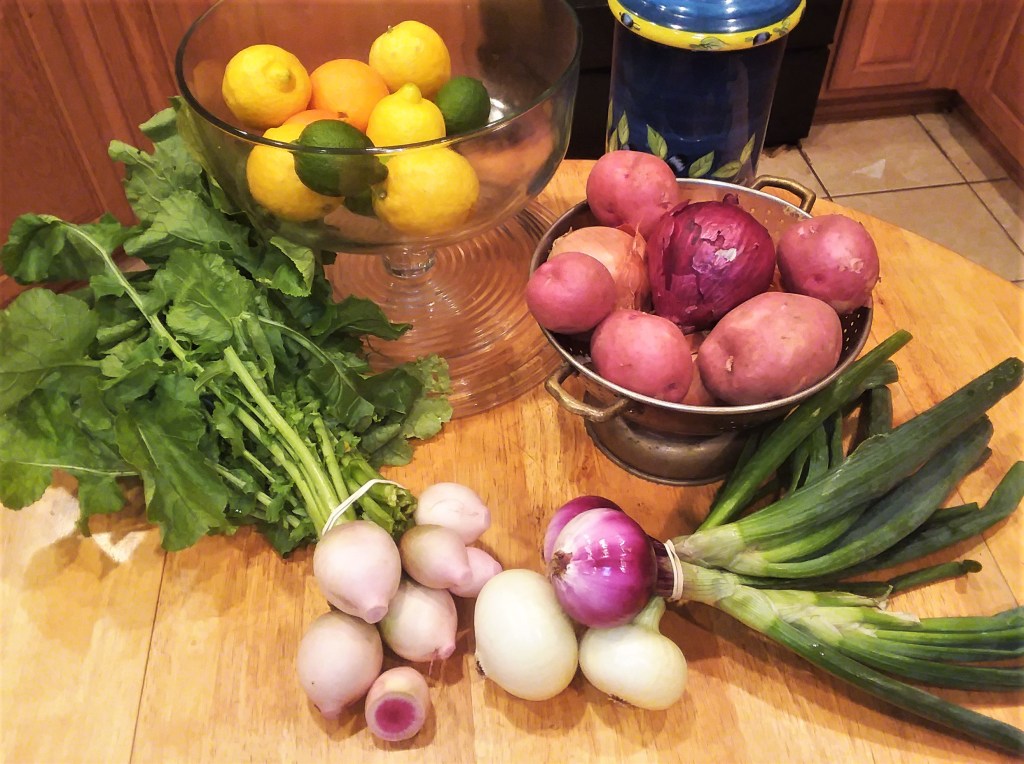
Right now, I am going to concentrate on the ‘Lowly Radish’.
Up until recently, I only knew of one type of radish. The little round red ones you see at the supermarket. My first experience with a different radish came from a visit to an Asian market where I became familiar with the large, long white radishes called daikon.
I first used it for carving and decorations for salads. Then I discovered the watermelon radish, a beautiful pink inside. Again, I used it for decoration. Since then, I have found out it can be used in soups and stir fries. There are several others I plan on using later on.
On a recent trip to one of those farmers markets I mentioned I spoke with an older farmers wife selling her home-grown vegetables. She had watermelon radishes. Rare to find because the stores like Whole Foods sell out quick when they do have them.
Anyway, we began talking and that is when I found out that like beet tops, radish tops were also edible. So I purchased them. When I got home from the farmers market the first thing I did was cut the greens from the roots.
Otherwise, the leaves will pull moisture from the radishes, and they won’t stay fresh for long. If you’re not using the greens right away, wash them wrap them up with a damp paper towel and store them in the crisper drawer of your fridge.
The first dish I prepared was a wilted salad. The lovely peppery flavor, hot bacon grease, vinegar dressing was topped with chopped boiled egg was better that the wilted spinach salads I have had. I just made a pesto with the greens and it is the best I have ever tasted. These are just two ways I have used them so far.
The following information was gathered from my visits to the internet I wanted to include them here because they are worth knowing.
***
The health benefits of radish leaves are varied ranging from treating diabetes to rheumatism. It contains essential vitamins and minerals and it also acts as a detoxifying agent. The high iron and phosphorus content of radish leaves increases immunity and reduces fatigue. Radishes make a healthy addition to a renal diet. This is because they are very low in potassium and phosphorus but high in many other important nutrients.
The leaves on the radishes are not only edible, but they’re delicious. Radish leaves are not poisonous, and in fact they are a nutritious green that tastes similar to chard (in fact, they are in the same family of cabbages as kale and broccoli
A bit of caution. Vegetables such as artichokes, asparagus, broccoli, cabbage, Brussels sprouts, cauliflower, cucumbers, green peppers, onions, radishes, celery, and carrots can cause excess gas.
Radish juice works best to lessen inflammation and alleviate burning sensation associated with urinary tract disorders. It is also effective in flushing out excess toxins build up in the system thereby preventing infections in the kidney and urinary tract.
A 1/2-cup serving of radishes gives you 1 gram of fiber. Eating a couple servings each day helps you reach your daily fiber intake goal. Fiber helps prevent constipation by bulking up your stool to help waste move through your intestines.
Radish, particularly when eaten raw is low in calories but can be filling. A half cup of radish contains 1 g of fiber, which is important for weight loss. It helps you lower your cholesterol and increases your fiber intake aiding in weight loss. Radish has a low glycemic index.
Hopefully you will visit my blog again because I plan on exploring more of the lowly tops of fresh veggies!
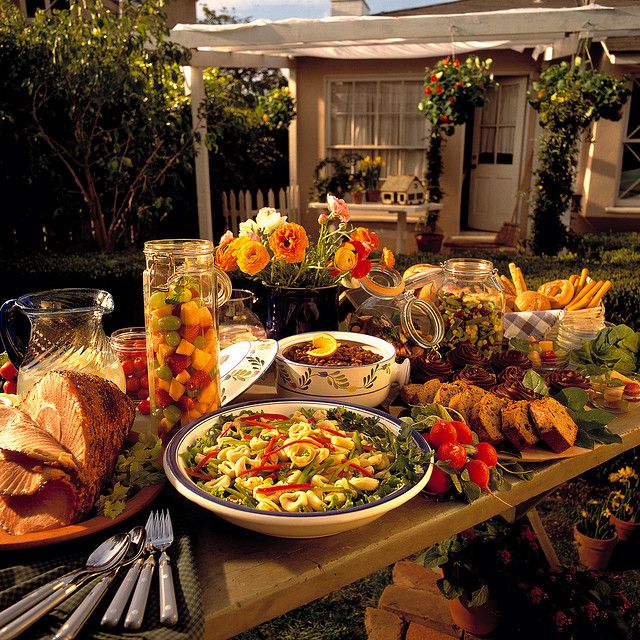
I love to host dinner parties. There was a time that I even thought about doing it for a living, back in the day. Mainly I never did do it for a living, but I did get paid for it, more often than not. Still to this day I enjoy the planning, shopping and especially the cooking for small parties of four to twelve. With social gathering opening in the state of Texas I thought it might be fun to share some of the guidelines that I always use for in home parties. Some to use for catering outside the home also.
The first thing I always do is select a theme. The theme makes selecting the menu and the courses that will be served easier to decide. Goodwill and thrift shops are a good resource for gathering items for your party without breaking the bank.
Second who will be attending. Is there any food allergies? Are there any vegans? Some invitees may be on self-restrictive diets. The biggest question of all do you want to accommodate those type of restrictions.
Is there a good mix of interests. It could get very awkward if you maybe have an avid hunter at the same table with a person that is against hunting for any reason or guns for a matter of fact.
Once those things are decided the next is deciding what food courses will be served. What dinnerware is to be used. Will it be formal, casual, family or backyard picnic style. Fine china and crystal or paper plates and plastic. Maybe use mason jars for drinks. Often mismatched plates and glassware is a fun and personal touch.
It really is up to you to decide. There are drawbacks and perks to all of them, it really depends on the type of party you are giving. For a small dinner party that everyone will be seated at a table I like to lay out all the dinner, flatware and serving pieces on the table to make sure there is adequate space for everything including the side dishes. Often time it is very beneficial to add a couple of small side table for extraneous uses like extra drinks, breads or items that the guests may want seconds from.
Now is the fun stuff. Bringing the theme home with decorations and food. The internet has thousands of ethnic recipes along with tutorials to show how to cook just about anything. As far as decorations go your imagination is the only limit you have. I have put in a few here just for some ideas to maybe get you started into thinking what can be done.
I hope this gave you a few guidelines for planning your next party.
Are you one of those cooks that throw away all of their meat scraps? What I am talking about are bones, chicken, beef and pork. Shrimp and lobster outer shells and heads. Finned fish heads and bones. And don’t forget the meat drippings left after cooking certain dishes!
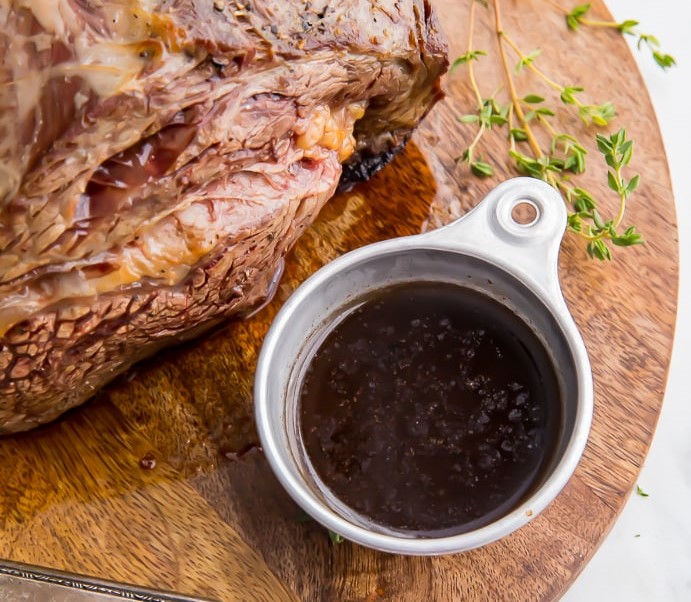
All of the aforementioned are types of jus, which is cooking gold when it come to flavor.
Jus (pronounced ‘zhoo’) is a natural by-product, the literal ‘juice’ that comes off cooking meat. Some call it the ‘pan drippings’. Others call it the ‘purge’ but I don’t like the name as it produces a negative picture in my mind. Especially for something that is packed with the flavor and essence of the meat itself!
Au jus is a term that means cooking (or serving a dish) with the juice of the meat. For example, a French Dip sandwich served au jus is typically a sliced beef sandwich served with a side of the meat juices that came off the beef as it cooked, along with a dash of butter, flour, and red wine.
Don’t trust any recipe that claims you can serve au jus without the pan drippings! You can also purchase pre-made jus from the store, but it’s a pale imitation. The best jus comes naturally off of a meat dish as it’s cooking, so long as it’s over a moist form of heat (say, braising instead of grilling).
Sometimes the process yields interesting results! The other day after making a batch of beer-braised pulled pork, I poured the results through a fat separator and into a clean mason jar. After letting the mixture sit for a few minutes, this is what I got, which is rather pretty. The thin gold layer at the top is the remaining fat. In the middle is a dark layer of liquid pork stock. At the bottom are a mix of very fine particles including the spices, and other bits of pork goodness.
This whole jar is pure flavor. After being placed in the fridge or frozen it will be in a soup, gravy, sauce, or a dozen other applications.
A beautiful mason jar of pork au jus.
Pan drippings after frying or searing a protein can and should be used to make gravies or sauces.
With roux made from flour or cornstarch in the pan. Flour for gravies and cornstarch for sauces. Cornstarch gives a glossier sheen for your sauces, Flour provides a denser, more substantial product. I usually mix my thickener with water before pouring into the drippings that way it insures it to be lump free.
A handy hint to make a roux in advance to use in the darker gravies; bake flour in a 400 degree oven until it is a golden brown. You will need to watch it and stir it often to ensure that it doesn’t burn. When it is the golden-brown color take it out and let it cool the put in an air tight container for use later. It will enhance the brownness of the darker gravies or demiglace.
For years, I thought that cooking with a wok was for only Asian Food and gas burners. Boy, was I wrong!
Woks are one of the most useful cooking pans that can be used in the kitchen. They can be expensive, heavy and come in all sizes. I have two. One I purchased about two years ago and was not successful in the use of it so I put it in the pantry and have not used it since.
That is changing now that I have learned the cuisine magic that can be produced with this marvelous invention that has been used for generation after generation.
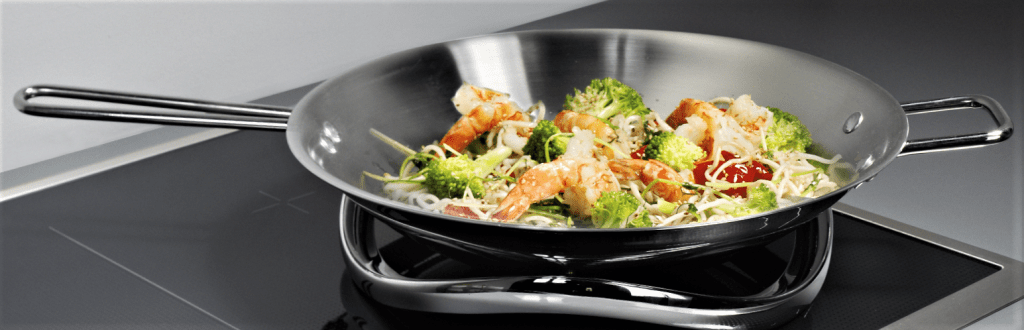
The wok is not only for stir-frying—it can be used for pretty much everything. Woks are designed to cook foods hot and fast, so you need to use a type of oil that is approved for cooking over high heat.
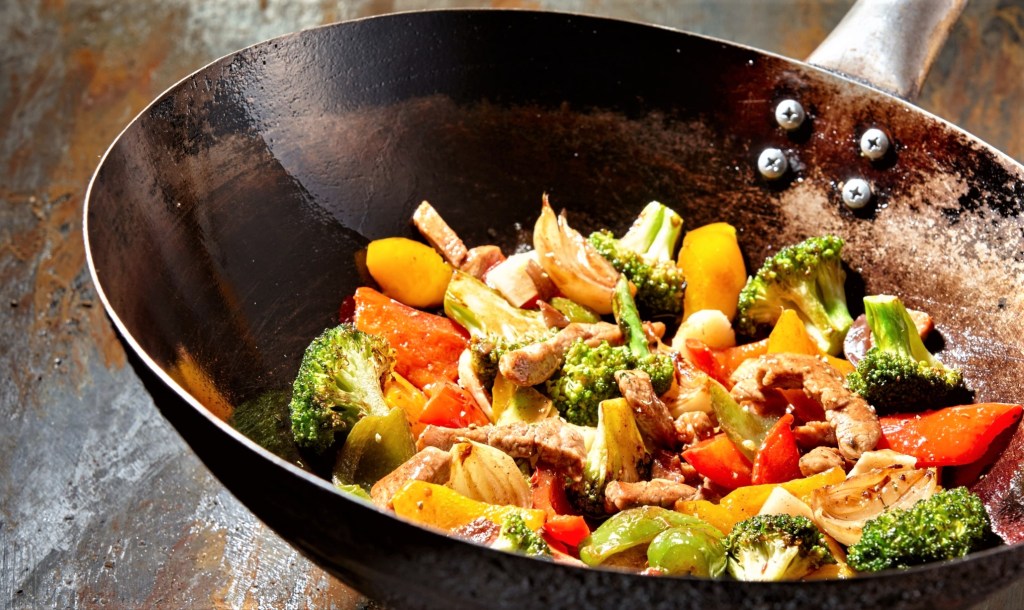
The perfect piece of cookware for hot n’ fast stir frying among other things.
You need much less oil to deep-fry in a wok than in a regular saucepan. You can put a bamboo steamer in the wok, fill the base of the wok with water and steam like that, or get little metal trivets in the bottom, lay a dish on the trivet, and cover with a wok lid.
You can also use it for boiling and making stews, or even as a smoker—you cover the base of the wok with several layers of foil, and then you put some sugar and tea leaves and some flour. Heat it up until the sugar is burning and everything is smoldering, and you can put food on a rack, put the lid on, and do hot-smoking like that.
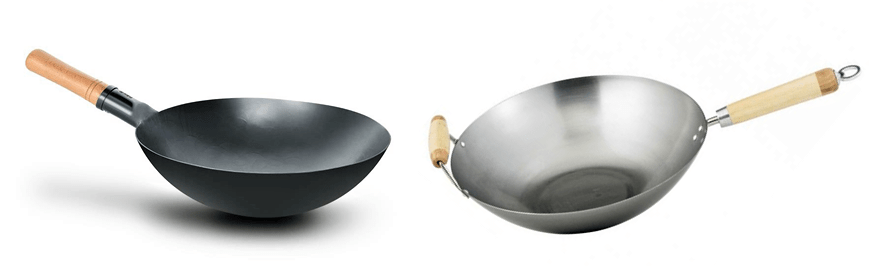
When you’re choosing a wok, you need to think about what kind of stove you have. If you have a gas flame, you can have a traditional round-bottomed wok. But if you have an electric stove like I have, then you need a wok with a flat bottom. As for materials, I favor the carbon steel one, which heat up and cool down quickly.
Left: A traditional round-bottomed wok. Right: A flat-bottomed wok.
The average wok seems to be priced at around $50. I found one at the Goodwill Store for $14. It is a 12-inch steel with a lid. The steel appeared to be stained but it was otherwise in good condition, so I bought it. Little did I know that the staining was the patina giving it the non-stick quality of a well-seasoned wok.
After watching the care and use of woks on the internet and putting the techniques to practice I have used my wok almost daily. Everything from deep frying to frying eggs.
They have different sorts of handles. Some have one long handle—that is the easiest thing if you want to toss your food around. Other woks will have two ear handles. The good thing about those woks is they’re very stable, so for boiling or deep-frying, you do want it to be safer. My wok is 12-inches with one ear handle and one long handle it seems to be just right for at home cooking.
While Wok cooking is seemingly all drama with high flames that curve up around the underside of the round-shaped pan with clouds of smoke filling the kitchen. This is not necessarily the case. It depends entirely what you are cooking and whether or not you are steaming or frying. What it does do I have found out is cut down on the actual time taken to cook and it enhances the natural flavor of the food being cooked.
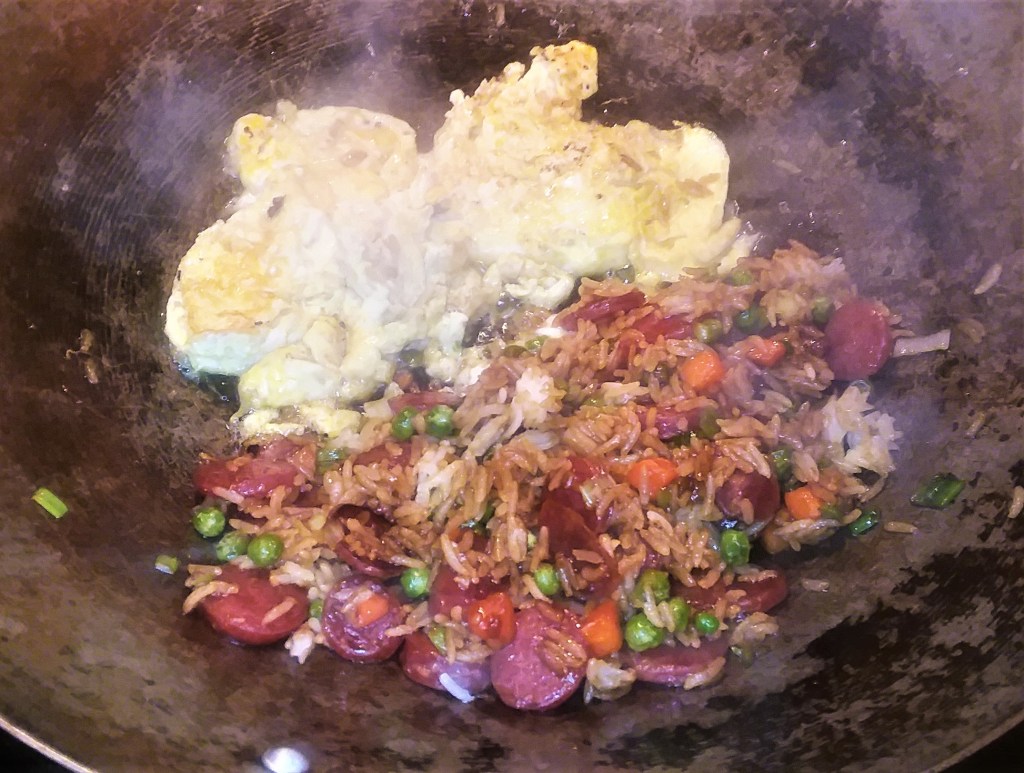
Using my wok for a classic Asian dish – fried rice with eggs and Chinese Sausage!
The wok distributes the heat more evenly than most flat-bottomed pans. What this means is you can put the heat up high to get the pan really hot and because of the steep sides you prevent burning by moving the food around. Stewing, steaming, boiling, and deep-frying are all within the wok’s repertoire.
Always season the surface of your wok before cooking. If you don’t do this you will have sticking. Sticking food will burn. Burning unlike charring will change rather than flavor the food and makes it harder to move food around. To avoid this is to put a little bit of oil just enough to swirl it around the inside cooking surface of the wok, letting it get smoking hot. Then pour the oil. Use fresh oil for cooking.
Oil with a high smoke point, is best. I use canola oil but I also use olive oil.
Classic stir-fry is often done at very high heat. The Chinese use the term the wok-hai, the fragrance of the wok from a kind of searing. Stir fry can have a bit of hissing, and some smoke. But you don’t want to heat the oil up so hot before you put in your aromatics because they can burn and turn bitter very fast.
After seasoning the surface get the wok really hot before you begin quickly put in garlic or chiles or sensitive things so the oil isn’t burning hot when you begin. You can extract the flavor without discarding or burning them.
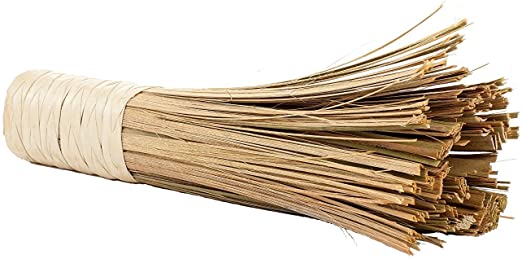
A wok spatula with a long handle is particularly good tool for scooping off the base of the wok when stir-frying. The other cooking utensil that’s useful is a Chinese ladle, the bowl is at a different angle than the Western soup angle making it easier to use with the shape of the wok. You can use it for scooping up oil, stock, or water, or for mixing up sauces before adding to the wok. A scoop with holes in it is good for scooping food out of oil or sauce. A bamboo brush whose bristles won’t melt is essential for cleaning the pan in between dishes while it’s still hot.
My favorite way to clean a wok: the bamboo whisk!
I have never learned the toss. I have seen instructions they read like this. “You just push the wok away from you and raise it and flip the food towards you. When you want to cook food very rapidly, it’s a way of moving it around. It’s always a good idea to practice without too much food and oil first. You could even practice with just some salad in it off the heat.”
If you want to make more food, it’s better to not just double the quantities for a stir-fry. If you try to stir-fry too much food, you won’t get the searing heat needed for traditional stir fry. Vegetables have a lot of liquid in them. When the wok is over loaded with food the temperature can’t return to heat as quickly as needed to which will cause inadequate cooking making everything mushy. It’s better to do in different batches.
If you have ingredients that cook at different rates, do them separately and incorporate them at the end and they’ll both be perfect. For example, you’ve got some crunchy vegetable and some slices of pork or chicken. You want your meat to be really juicy, not dry. Stir-fry your meat until they’re just right. Take them out and put them in a dish. Then cook the vegetables, and when they’re just right, you put the pork or chicken back in the pan. That way everything will be cooked correctly.
The trick is knowing when to add what ingredients based on how fast they cook.
Unlike a lot of the pots and pans used in the kitchen everyday Woks are practically indestructible. There is no special care really needed for them. If the wok needs a good cleaning, give it a good cleaning.
After cleaning you re-season it: After cleaning, heat the wok very hot, then rub it with a thick wad of paper towels and some oil. Let it get very hot and then let it cool again. It may even get a bit rusty. But it doesn’t matter! Just rub away the rust with wire wool, re-season it with a bit of fresh oil, and you’re good to go.